
Inside out layouts with Hugo partials. Pt 2
This article will build on the concepts of inside out partials pt 1 and cover how we use cloudcannons bookshop schemas and cms to make our partials shine.
Before you start: Make sure you understand our partial layout by reading
Inside out layouts with Hugo Partials. Part 1
In our previous article we described how we used inside out partials to keep our code consistent as possible. In this one we will leverage cloudcannons bookshop and cloudcannon cms to step it up a notch and not only keep the code consistent but also give us the flexibility to change the layout per item on the page without changing the code base. This makes layouts powerful and easy to apply, just the way we like it.
This article will cover the following:
- Installing Bookshop
- Setting up our CMS
- Making bookshop blueprints
- adding bookshop to our pages.
- building our pages with layouts.
Installing bookshop
Since we are using a docker image the first thing to do is use our run script we made in building our docker image. The link is in part 1.
./run.sh hugo bash
Once inside we should have a command prompt. We then follow the bookshop installation instructions from cloudcannon
npx @bookshop/init --new component-library --framework hugo
select y when it asks to install and I will use yaml for configuration.
Following along our next step is to update our configartion. Since we have been using YAML we need to open our config.yaml and add the following
module:
  replacements:
    - 'components.local -> ../component-library'
  imports:
    - path: components.local
    - path: github.com/cloudcannon/bookshop/hugo/v3
We can then follow along again to our bash terminal and run the following commands to install bookshop engine in our package json and to setup a go.mod which we haven’t yet done, respectively
npm i --save-exact @bookshop/generate @bookshop/browser @bookshop/hugo-engine
hugo mod init site.local
Exit out of our bash terminal and in our regular terminal run our up script to make sure all is running well
./up.sh
Setting up our CMS
Requirements: A sourcecontrol website (We use github)
Steps:
- create a site
- configure site
If you don’t have your code in a source control setup, you need to do so now. There is a quick series of pictures below but I also encourage you to go through the official docs
Otherwise lets follow the pictures to set this up
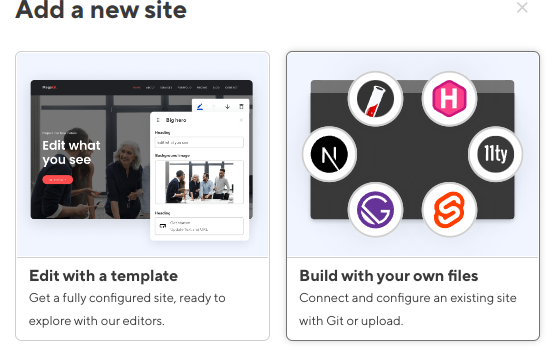
First create a new site

Then select existing files
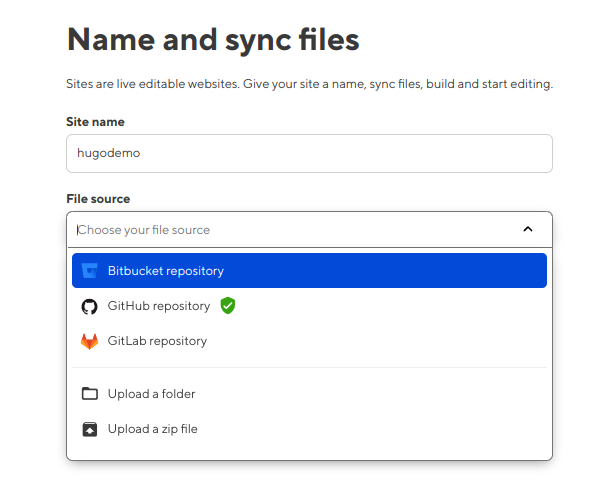
Choose your source control
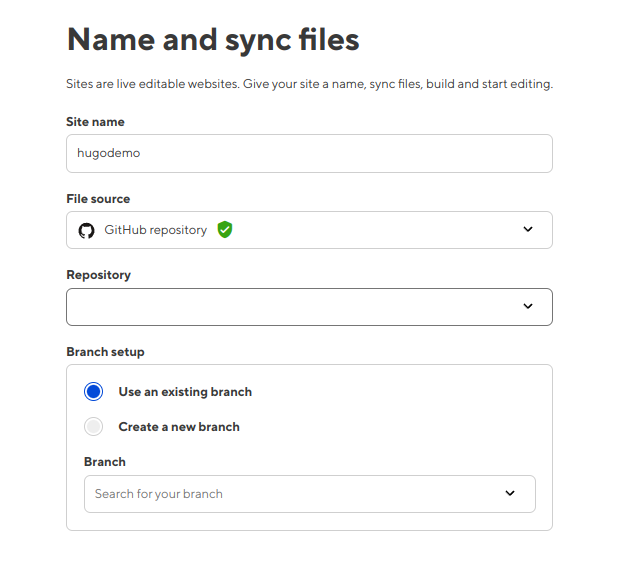
And last choose your branch which should already exist
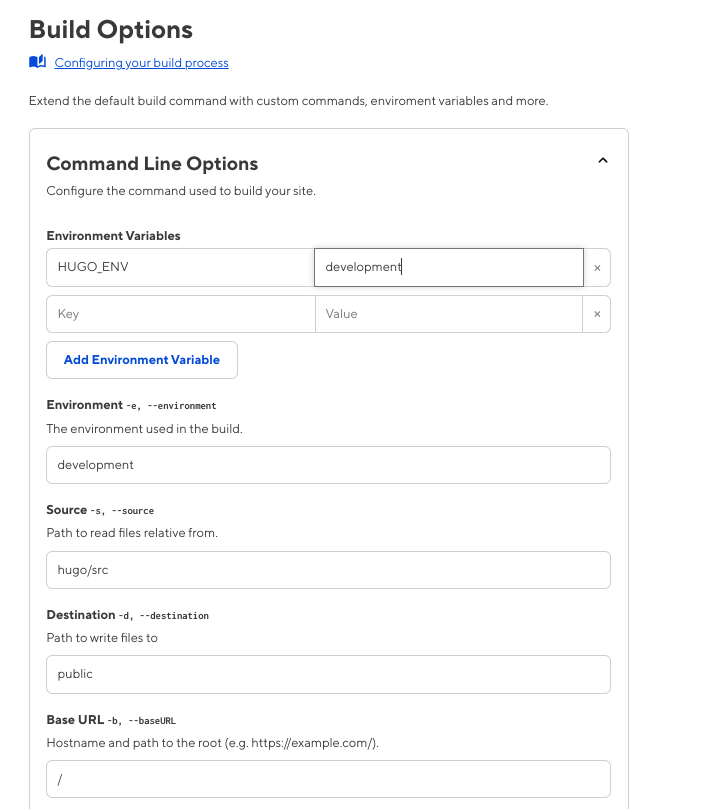
This should take you to build configuration. Because we are using the docker setup we need to make a few slight changes particularly the source folder is hugo/src to match with our file structure. This is an example setup looks like this.
And with that we should have a build.
Making bookshop blueprints
At this point we should have a layout partial and a paragraph partial. We are actually going to move those and make some slight changes to our code and add a blueprint schema that we can use.
Lets start with our /partials/layout.html
Looking at our bookshop folder structure we have a definite place to put components. hugo/src/component-library/compontents
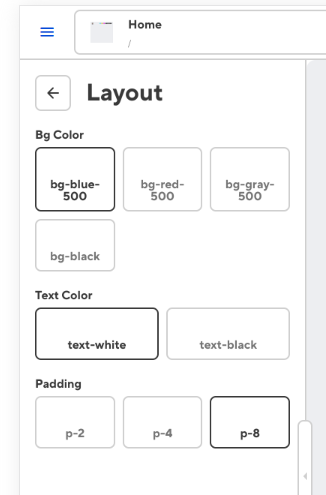
Inside of this we will make a folder called layout. We really want to create a schema for what our layout can/will do so we need to create a layout.bookshop.yml file. For now we will use the bookshop structure of content_blocks and then add the yml structure for the features we think belong in a layout wrapper for a component. For this example I will use bg_color,text_color and padding
hugo/src/component-library/compontents/layout/layout.bookshop.yml
spec:
  structures:
    - layout_wrapper
  label: Layout

blueprint:
  bg_color:
  text_color:
  padding:

_inputs:
  bg_color:
    type: choice
    options:
      values:
        - bg-blue-500
        - bg-red-500
        - bg-gray-500
        - bg-black
  text_color:
    type: choice
    options:
      values:
        - text-white
        - text-black
  padding:
    type: choice
    options:
      values:
        - p-2
        - p-4
        - p-8
Next we need to also have a hugo/src/component-library/compontents/layout/layout.hugo.html
Bookshop components don’t require the .Params feature for reading from the front matter and in fact, we rarely worry about the front matter since bookshop takes care of that for us. This lets us just use ‘.<value_name>’ inside our bookshop we will also pass the content as content and the params as .parms
{{$content := .content}}
{{with .parms}}
    <div class=" {{.bg_color}} {{.text_color}} {{.padding}}  " >
    {{$content | safeHTML}}
    </div>
{{end}}
Great next lets build a paragraph component.
Similar to the previous we will need to setup a folder for this but similar to our original post we will need a nested folder for the component. Our final structure should look like this
-hugo
 - src
  - component-library
   - components
    - layoout
    - paragraph
     - paragraph.bookshop.yml
     - paragraph.hugo.html
     - component
      - component.hugo.html
Our paragraph.bookshop.yml is incredibly easy. We will use the standard content_blocks for the structure as we will use it later.
#paragraph.bookshop.yml
spec:
  structures:
    - content_blocks
  label: Paragraph

blueprint:
  layout: 'bookshop:layout'
  paragraph:


_inputs:
  paragraph:
    type: markdown
As in our previous we will setup the paragraph component to call the layout and pass itself in as the .content value
`paragraph.hugo.html
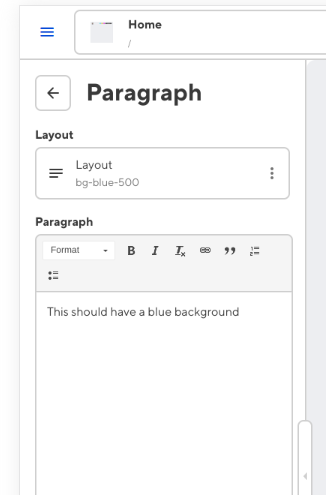
{{partial "bookshop" (slice "layout" (dict "parms" .layout "content" (partial "bookshop" (slice "paragraph/component" .))))}}
and our component.hugo.html will be easy as well
<div>{{ .paragraph }}</div>
Great our components are setup. We only have two more steps before it’s ready to use in our CMS. We just need to tell our page to use bookshop. This step could have been done earlier but here we are.
Adding bookshop to our pages
‘hugo/src/layouts/_default/home.html` add the following right after main or anywhere you want bookshop components to be used.
{{ partial "bookshop_bindings" `.Params.content_blocks`}}
{{ partial "bookshop_partial" (slice "page" .Params.content_blocks ) }}
And finally looking at the hugo bookshop install steps we need to add our .cloudcannon/postbuild file at the root of our project
npm install

npx @bookshop/generate
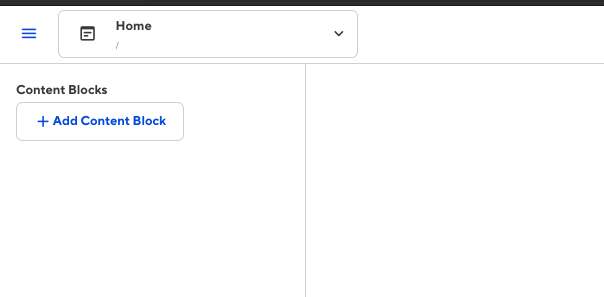
Looking at cloudcannon we can got to our home page and add paragraph content blocks
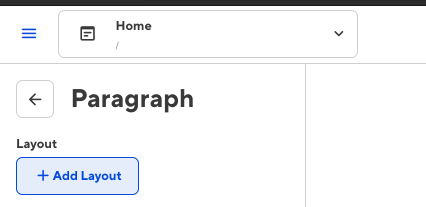
Add a layout
Select the layout
And some text
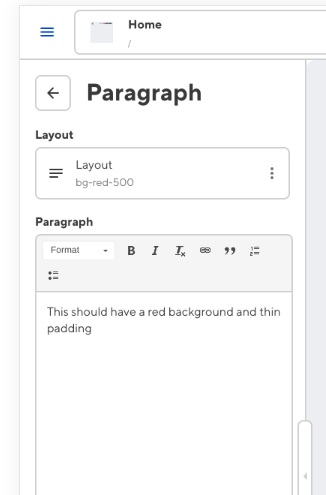
Repeat with different settings
And…
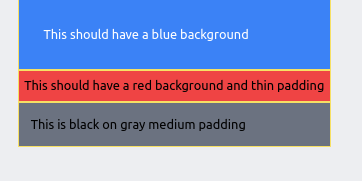
Success! We have one place to develop our layout but it can be infinitely applied to any components our hearts desire. Components can quickly and easily have a layout applied without additional code allow us to focus on just the component keeping our layout and components separate while minimizing the number of places to edit layout code.
While all this is a simplification of how we use it, we think it is a very practical and powerful way to have layouts applied to your SSG.
Update: This was how I did things, now I do it a different way. In the next part I will go over how we apply this idea to a page helper so that we can simplify it that one bit further remove the need for a component folder and move on.
Happy coding.